Drawing Complexes
Using GABEDIT to draw Lanthanide Complexes and run MOPAC2012
Please, download and install MOPAC2012.
While you wait for the MOPAC2012 password to arrive (it takes about three days), it is a good idea to practice drawing complexes in GABEDIT.
Thus, please, download, install, and learn how to use GABEDIT.
Study your lanthanide complex
- Determine the coordination number of your lanthanide ion in your complex of interest, e.g, 8, 9, 10, 11, 12, etc.
- Determine the total charge of your complex.
- Determine which atoms are directly coordinated to the lanthanide ion.
- For each type of atom direcly coordinated to the lanthanide ion, determine the maximum number of bonds in your complex. Example: if water is coordinated to a lanthanide ion, the oxygen has a maximum bond valency of 3.
Strategy to draw a lanthanide complex in GABEDIT
Before we start drawing complexes, let us understand the strategy that makes this task fast and efficient:
- Choose one of the ligands and draw it first.
- Pre-optimize the geometry of the first ligand with molecular mechanics.
- Draw the lanthanide ion, and connect it to the first ligand.
- Pre-optimize the lanthanide ion with the first ligand.
- Now, draw the next ligand and connect it to the lanthanide ion.
- Then, pre-optimize the resulting structure.
- Keep doing this for each of the ligands, one by one, until the complex is fully drawn.
Prepare GABEDIT so that you can draw your lanthanide complex
-
From the main menu of Gabedit, click on the "Draw Geometry" icon
 . Another option would be to select the Geometry/Draw drop down menu. You will obtain a new window (gray by default).
 -
Right-click anywhere on this window, and then choose “Set” > “Properties of atoms”. A periodic table appears.
-
Click on the lanthanide atom symbol of your complex, a new window called "Set properties of Ln atom" appears.
-
Change its "Maximum bond valence" to exactly the number you need to connect the lanthanide ion to the first ligand. Click OK. This small window closes and you are back to the periodic table. You will need to repeat this operation every time a new ligand is added, by increasing the Maximum Bond Valence of the lanthanide ion to the exact value needed to connect it to the existing ligands.
-
Now, click on each of the coordinating atoms, eg. O and N, and change their "Maximum bond valence" fields to the numbers determined in item 4 of the First Step (above). This small window closes and you are back to the periodic table.
-
Perhaps you will also need to increase the maximum bond valence of other atoms, not necessarily directly coordinated to the lanthanide ion, but involved in hypervalent bonds, such as N, O, S, Se, etc. Please, proceed as described in the steps 1-5 above.
-
Close the periodic table window.
Draw your lanthanide complex in GABEDIT
- To start, let us draw the first ligand.
- Choose the ball and stick format, by clicking on the "render Ball&Stick" icon,
 , in the bottom pat of the left icon column. We recommend this in order to make it easier to change from a single bond, to a double bond, or to a triple bond.
 - In the left icon column of the gray "Gabedit: Draw Geometry" window, click on the "Insert/Change atoms or bond" icon
 .
. - Click on the "Set atom to insert" icon
 . A periodic table appears. Choose your atom and click on it. The periodic table will close.
- Left click anywhere in the gray area of your "Gabedit: Draw Geometry" window. If your atom will appear bonded to a number of hydrogen atoms. Do not worry: as you add the ligands, the hydrogens will disappear one by one.
- Draw your complex according to the strategy suggested above, and atom by atom, where the bonds are created by clicking and dragging from one given atom to a point in the gray area. When you release the mouse, the new atom will appear bonded to the given atom.
- The top four icons on the left column of the "GABEDIT: Draw Geometry" window,


 , move the whole molecule around. Please, experiment with these icons at will.
 - To replace an atom: (i) click on the "Insert/Change atoms or bond" icon ; (ii) click on the "Set atom to insert" icon ; (iii) choose your new atom on the periodic table and click on it; (iv) click on the atom you want to replace. This atom will then be replaced by the new chosen one.
- To change the bond order, click on the "Insert/Change atoms or bond" icon and then click on the bond. Make sure you are using the Ball&Stick mode as indicated in item 3 above.
- To add a fragment to an atom, first choose the fragment; then, click on the atom, hold, drag, and release.
- To delete an atom, or a bond, click on the "Delete selected atoms/bond" icon
 , and then click on the atom you want to delete.
- To delete a bond, click on the "Delete selected atoms/bond", and then click on the bond you want to delete.
- To move around a single atom or a subset of atoms, first click on the "Selection of atoms" icon
 , and then select with the mouse an area including the atom or the subset of atoms you want to move. The selected atoms will appear surrounded with green circles.
 - Click on the "Move selected atoms" icon,
 , then click on one of the selected atoms and drag it around.
 - You can measure atom-atom distance, angles and torsion angles. For this, click to the
 icon and select from two to four atoms of the molecule, by simply clicking on them.
- To delete everything in the "Gabedit: Draw Geometry" window, right click anywhere on it; on the drop down menu that appears, choose "Edit" > "Delete molecule". A small warning window appears - click on the "Yes" button.
Using molecular fragments to draw your lanthanide complex in GABEDIT
- You must have learned the steps explained in the Draw your lanthanide complex in GABEDIT section above.
- Perhaps some of the ligands are present in the fragments library of GABEDIT. To access this library, please click on the "Insert a fragment" icon
 , on the left icon column of the gray "Gabedit: Draw Geometry" window. A new "GABEDIT: Fragment Selector" window appears.
- On this window, choose the class of fragments you think will contain your fragment; and then click on the small right pointing arrow on the left side of it. This arrow will then point down and a list of fragments will appear.
- Choose the fragment by clicking on it. An image of the fragment will appear on the small black box in the bottom of the "GABEDIT: Fragment Selector" window.
- To add a fragment to an atom, first choose the fragment; then, click on the atom, hold, drag, and release.
- To move a fragment around, first first click on the "Selection of atoms" icon and then press the Shift key and at the same time click on one of the atoms of the fragment. The whole fragment will be selected.
- You can move or rotate the selected fragment by clicking on the "Move selected atoms" icon , or "Rotation of selected atoms" icon
 , or "Rotation, about z, of selected atoms" icon
  .
. - To delete an atom, a bond, or a selected fragment, click on the "Delete selected atoms/bond" icon
 , and then click on any atom of the selected fragment you want to delete.
 - You can measure atom-atom distance, angles and torsion angles. For this, click to the icon and select from two to four atoms of the molecule, by simply clicking on them.
- Make sure that the drawn complex appears to be with a reasonable geometry to serve as a starting point for the pre-optimization with molecular mechanics. If not, edit the complex, move the ligands until you are satisfied with the result.
- To delete everything in the "Gabedit: Draw Geometry" window, right click anywhere on it; on the drop down menu that appears, choose "Edit" > "Delete molecule". A small warning window appears - click on the "Yes" button.
- For detailed instructions, please click on the Help button,
 , on the bottom-right corner of the "GABEDIT: Fragment Selector" window.
Pre-optimize your complex using molecular mechanics
- Pre-optimize your lanthanide complex as you build it according to the strategy described above and following the instructions which will be given below.
- Also, before sending your complex to MOPAC2012, you must also first pre-optimize it using a simple molecular mechanics model, to make sure its geometry is at a good starting point.
- To complete this task, your structure must appear drawn in the "GABEDIT: Draw Geometry" window, with all atoms and bonds properly connected. Make sure there are no spurious atoms and fragments floating around in the window.
- Right click anywhere on the gray "Gabedit: Draw Geometry" window. Select “Molecular Mechanics” > “Optimization”. In the small "Molecular Mechanics Minimize" window, leave the parameters at their default settings and click the OK button.
- Recheck that the pre-optimized molecule appears to be with a reasonable geometry to serve as a starting point for the MOPAC2012 calculation. If not, edit the complex, move the ligands around until you are satisfied with the result. Then, run the molecular mechanics optimization again.
- Whenever a pre-optimization is finished, we recommend that you save the resulting structure to a file, so that if something goes wrong, you will not have to restart everything all over again. Right click anywhere on the gray "Gabedit: Draw Geometry" window. Select “Save as” > “Gabedit file”.
Optimize the geometry of the lanthanide complex with MOPAC2012
- Right click anywhere on the gray "Gabedit: Draw Geometry" window. Select “Semi-empirical” > “Mopac Sparkle Optimization”. A small window named “Semi-empirical calculation/MopacOptimizeSparkle” appears.
- Set the charge of the complex. Click on the arrow on the right side of "Charge" and wait for the charge of your complex to appear. Please, be patient!
- If you chose the correct charge and if your complex is properly drawn, the spin multiplicity will be automatically set to 1 (singlet). If it is not 1, then this is an evidence that there is something wrong either with your charge, with the drawn complex, or both; in which case you should recheck everything.
- In the field "Model", you may choose either AM1, PM3 or PM6. The sparkle model is implemented in MOPAC2012 for these three models only.
- In the field “Additional keywords”, replace GNORM=0.01 by GNORM=0.25, as such: GNORM=0.25.
- Click on the field at the right side of "Working Folder". A drop down menu will appear, select "Other..." and choose the folder where the MOPAC2012 input and output files will be saved.
- Finally, in the field "File name" write the name you want to be given to the MOPAC2012 input and output files.
- Click on the "Ok" button. If your MOPAC2012 installation is a default one, the calculation will run.
- If an error appears, that means that your MOPAC2012 installation is not a default one. But do not worry! Even in this case a correct .mop file has been created and is ready to run. Look for it in the working Folder you defined in item 6 above, and with the name you set in step 7 above and extension .mop . Please refer to Using MOPAC2012 for instructions on how to run this file on MOPAC2012.
- When the calculation ends, the optimized complex will appear on the "Gabedit: Draw Geometry" window.
- The bond connection algorithm of GABEDIT may not always work efficiently with some high coordination number lanthanide complexes. Every now and then, some bonds may not appear, while sometimes some other spurious bond connections may also appear. However, the positions of the atoms are always correct. You can erase the spurious bonds and/or draw the missing bonds as described in the Draw your lanthanide complex in GABEDIT section of this tutorial above.
- IMPORTANT: You must now guarantee that the complex geometry you found is a true minimum in the potential energy surface defined in the space of the coordinates of all nuclei. The technique for doing this is described in the Geometry Minimum tutorial, under the True Geometry Minimum tab.
Not only that, for some applications it is truly important to try to guarantee that the true minimum found is a global minimum in the potential energy surface. The technique for doing this is described in the Geometry Minimum tutorial, under the Global Geometry Minimum tab.
Please, download and install MOPAC2012.
While you wait for the MOPAC2012 password to arrive (it takes about three days), it is a good idea to practice drawing complexes in Hyperchem.
That is because it is easy to prepare input geometries of lanthanides complexes is by using the Hyperchem program.
You may download an evaluation version of Hyperchem. Follow their instructions (you need first to register and login) to install the program and obtain a temporary license. After installing the program you may practice with the tutorials.
How to draw lanthanide complexes in Hyperchem:
- Go to the Build menu and mark the option Allow Arbitrary Valence. That is necessary because lanthanides have high coordination numbers.
- To start drawing the molecule, go to the Build menu and, in the dropdown menu, select the option Default Element.
- A periodic table appears. Make sure that the Allow Arbitrary Valence square is checked. If not, check it now.
- At the periodic table, left-click on the element you want to use, close the periodic table window.
- The mouse cursor now changed to
 "Draw". Now click on the workspace to place the atom and start drawing your complex.
- Follow the steps above to place the remaining atoms of the molecule.
- You may choose to add the hydrogens during the drawing process or have them added later by Hyperchem.
- Draw the chemical bonds by holding the left button of the mouse and dragging the cursor between the two atoms you want to connect.
- To draw multiple bonds between two atoms, you need to repeat the step above the necessary number of times.
- Aromatic bonds are placed by double clicking the left button of the mouse at any bond of a closed ring of atoms.
- It is very important that all bonds are correctly placed.
- To finish the drawing process, use the button "Invoke Model Builder"
 in the toolbar.
- Double check to make sure that the program has added all necessary hydrogens and that it has not added any spurious hydrogens.
- To remove an atom or a bond, right click the mouse at the atom or bond you want to remove.
- The next step is to refine the geometry using a molecular mechanics method.
- Go to the Setup menu and, in the drop down menu, select the Molecular Mechanics… option. At the small window that appears, choose the MM+ method.
- Press the OK button.
- Go to the Compute menu and, in the drop down menu, select the Geometry Optimization… option.
- In the small "Molecular Mechanics Optimization" window that appears, you may choose any algorithm you want in the left Algorithm column. We recommend the Polak-Ribiere algorithm.
- For the termination condition in the right column, use a RMS gradient like 0.001kcal/(A mol) and 10000 maximum cycles.
- Press the OK button.
- Wait for the calculation to finish.
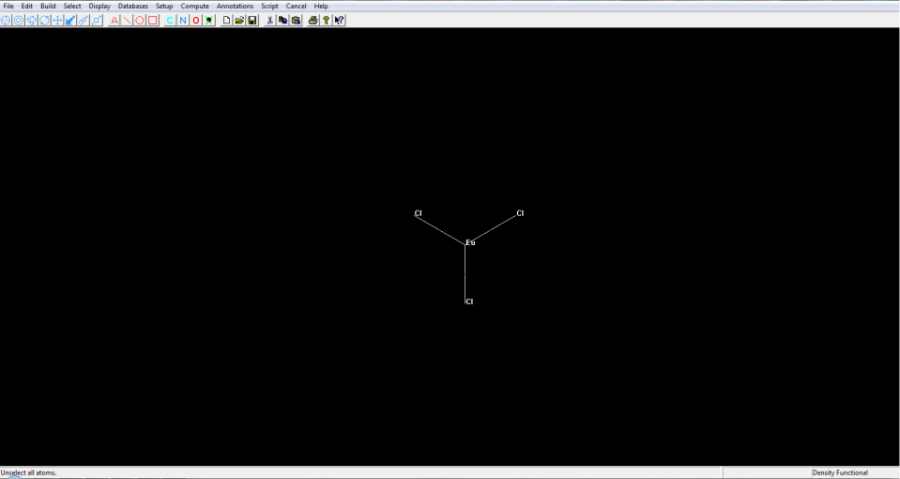
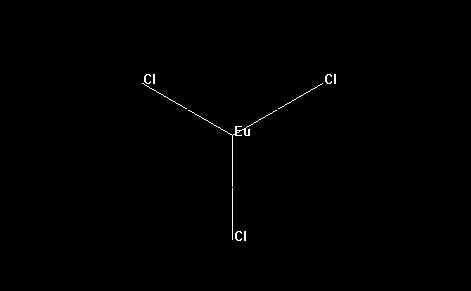
- As an example, for convenience, let us consider, below, the simple molecule europium trichloride: EuCl3. The europium ion is, of course, trivalent (3+), and each of the three chloride ions are -1. Hence, europium trichloride is a neutral molecule, with zero total charge.
- The final step is to save the molecule in a format that MOPAC2012 recognizes.
- Go to the File menu and select Save As...
- Choose a file name and the "MOPAC Z-Matrix (*.ZMT)" file type.
- Press the OK button. As an example, for convenience, we provide europium-trichloride.zmt.
- Go to the folder where the file is located and change the file extension from .zmt to .mop. As an example, for convenience, we provide europium-trichloride.mop.
- Edit this .mop file by adding the keywords “AM1 SPARKLE CHARGE=0 BFGS GNORM=0.25 XYZ AUX” and others you may want to use in the first line only. Only edit this first line, which was originally blank. As an example, for convenience, we provide europium-tricloride.mop.
- Warning: If there are less than two lines below the keyword line, you will probably get an error message in the .out file like: ATOM NUMBER 3 IS ILL-DEFINED. Besides, no .arc file will be created. To fix that, make sure that the first line contain the keywords, as indicated above, and that two lines for comments appear below it (either with comments or left blank). The first line with geometry data must be the fourth line, as appears below:
AM1 SPARKLE CHARGE=0 BFGS GNORM=0.25 XYZ AUX Insert a comment, or leave blank - line 2 Insert a comment, or leave blank - line 3 Eu 00000.0000 0 00000.0000 0 00000.0000 0 0 0 0 Cl 00002.8400 1 00000.0000 0 00000.0000 0 1 0 0 Cl 00002.8400 1 00119.9999 1 00000.0000 0 1 2 0 Cl 00002.8399 1 00119.9999 1 00179.9999 1 1 2 3 0 - If you prefer, you may also replace the AM1 keyword by PM3 or PM6, depending on the underlying method you want to use with the sparkle model.
- Leave all other lines as prepared by HyperChem.
- Make sure that the keyword CHARGE= has the correct charge for your complex. Above, we set the charge to 0, but it could be CHARGE=-2 or CHARGE=0, etc.
- Run the MOPAC2012 Program. You should get both an .out and a .arc file. As an example, for convenience, we provide europium-trichloride.out and europium-trichloride.arc.
- Warning: if you do not get an .arc file, then most likely your geometry has not been properly optimized. Look at the error message in the .out file, and try correcting the problem following suggestions in the error messages page in the MOPAC site. After fixing the errors, the geometry will be properly optimized and the corresponding .arc file will be produced.
- If the geometry optimization ends properly, the following text appears in the corresponding .out file:
CYCLE: 12 TIME: 0.000 TIME LEFT: 2.00D GRAD.: 1.088 HEAT: -5.702878 CYCLE: 13 TIME: 0.000 TIME LEFT: 2.00D GRAD.: 0.970 HEAT: -5.707086 CYCLE: 14 TIME: 0.000 TIME LEFT: 2.00D GRAD.: 0.773 HEAT: -5.708784 TEST ON GRADIENT SATISFIED PETERS TEST SATISFIED ------------------------------------------------------------------------------- AM1 SPARKLE CHARGE=0 BFGS GNORM=0.25 XYZ AUX Name: MOPAC file created on 23/3 15:18:43 2012 by HYPERCHEM PETERS TEST WAS SATISFIED IN BFGS OPTIMIZATION SCF FIELD WAS ACHIEVED - Warning: the complex geometry may be incorrect even though the geometry optimization terminated successfully. You must visualize the final geometry present in the .arc file.
- Open the .arc file which resulted from this last calculation. Find the line which reads "FINAL GEOMETRY OBTAINED CHARGE" and remove everything above and including this line.
- Edit this file by adding one last line and add the number "0" to it. The last line will be as shown below:
AM1 SPARKLE CHARGE=0 BFGS GNORM=0.25 XYZ AUX Name: MOPAC file created on 23/3 15:18:43 2012 by HYPERCHEM Eu 0.34582728 +1 0.00372042 +1 -0.00001580 +1 3.0000 Cl 2.65347083 +1 0.05617686 +1 -0.00156430 +1 -1.0000 Cl -0.85414150 +1 1.97548834 +1 -0.00066118 +1 -1.0000 Cl -0.76128638 +1 -2.02164890 +1 0.00207881 +1 -1.0000 0 - Save this file as a .zmt file with another name. For convenience we provide opt-europium-tricloride.zmt.
- Open HyperChem and go to the File menu and select Open...
- Choose a file name and the "MOPAC Z-Matrix (*.ZMT)" file type.
- Press the OK button and lanthanide complex will be shown, as appears below: